The SO-101 Robot Arms
For this first module, we will be setting up, calibrating, and running a teleoperation script to verify successful calibration. This will require using both the “Follower” arm and the “Leader” arm. If you have chosen to build your own robot by purchasing your own kit, I recommend only building your own “Follower” arm and using a leader arm for the class just for this initial module.
Building your own SO-101
If you would like to build your own robot, you can find a bill of materials here. For the course we will mostly just be using the follower arm, so I recommend only purchasing/building that arm. We will only be using the leader arm for this particular assignment, and you are welcome to just use the leader robots in lab. I also recommend following the print/build/setup instructions here.
If you are not interested in building your own robot, please use the robot arms provided in the lab. These robot arms must remain in Van Leer E265 at all times.
| Follower Arm | Leader Arm |
|---|---|
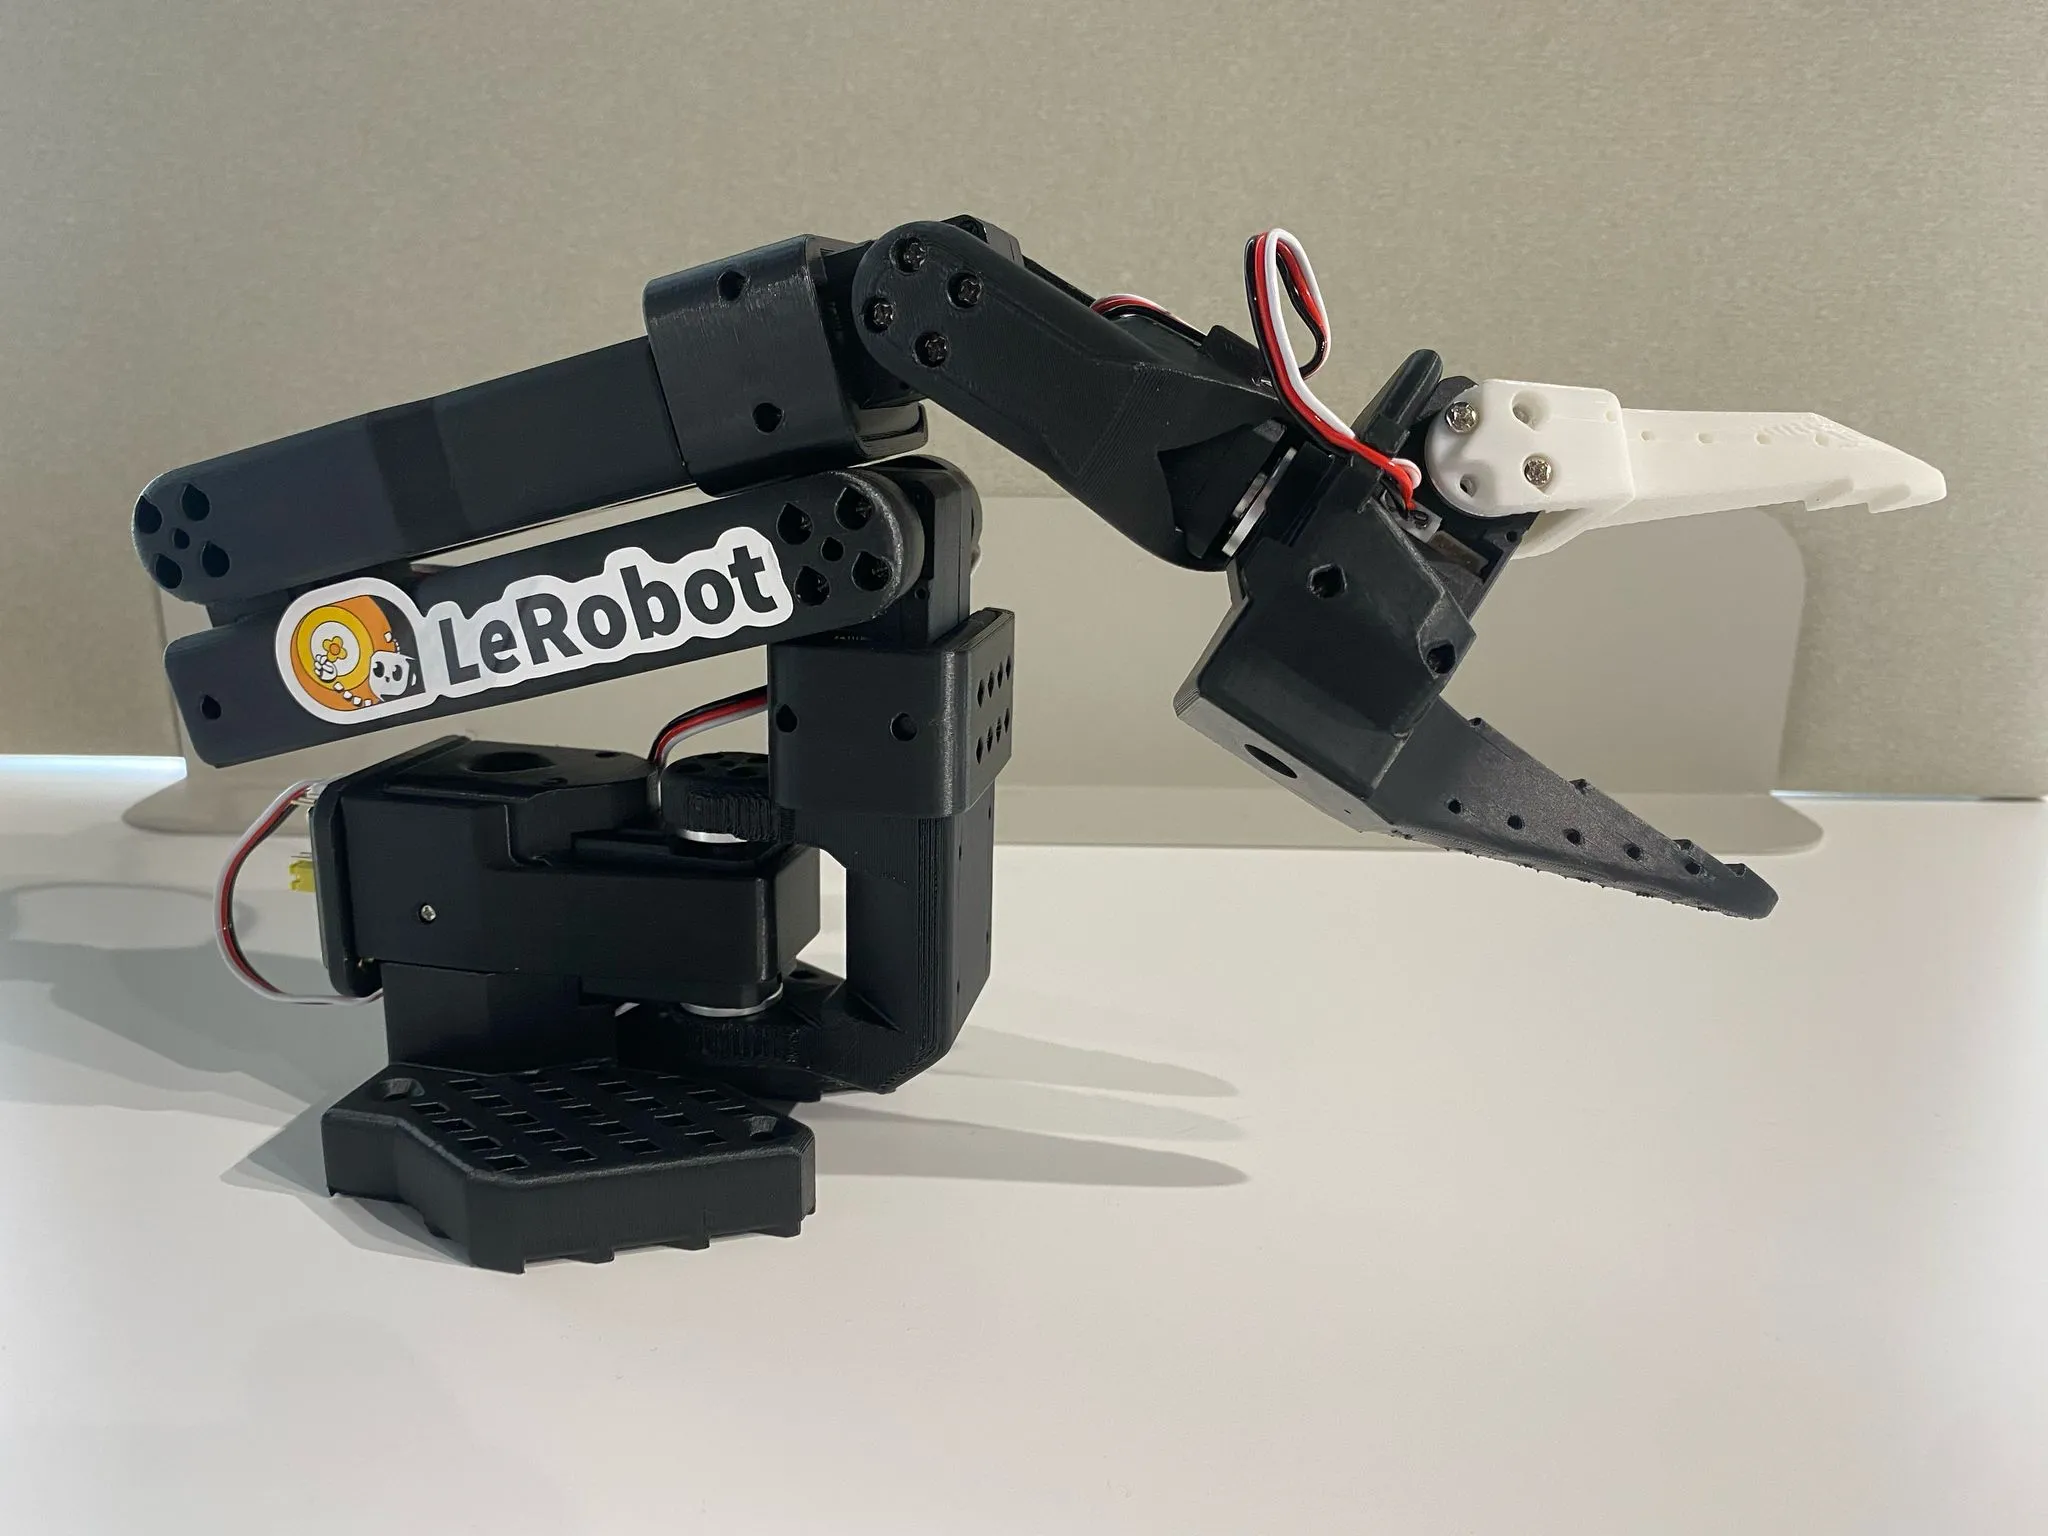 | 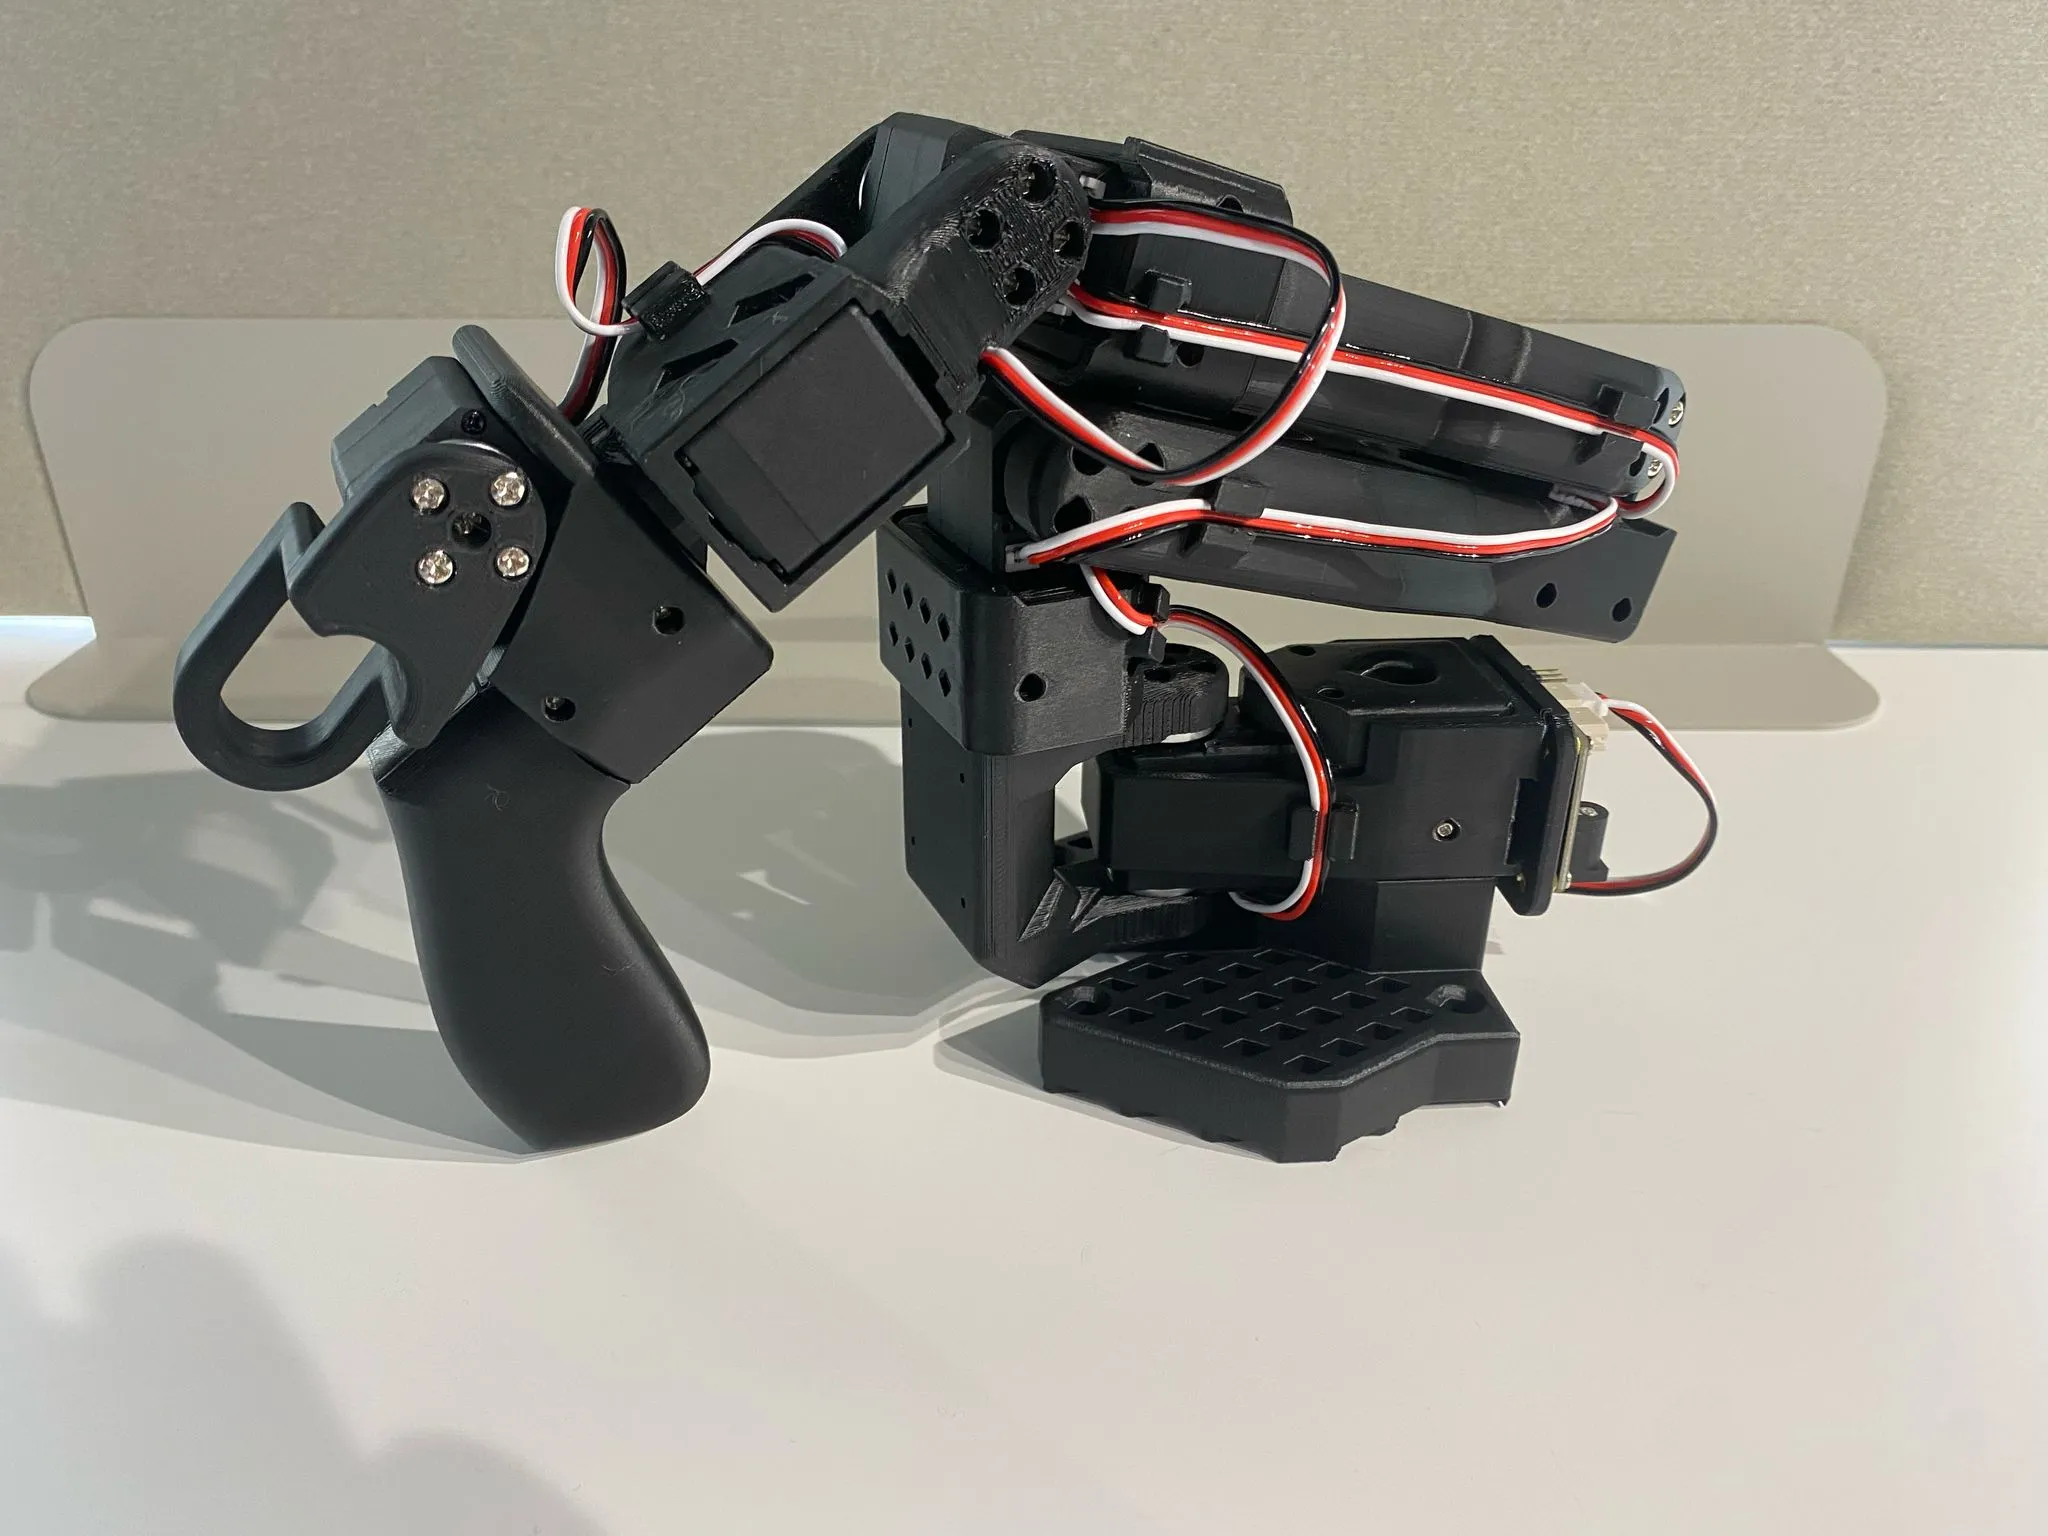 |
The purpose of the “leader” arm is purely for teleoperation – this robot uses motors with a lower gear reduction to make it easier to move around by hand. Alternatively, the “follower” arm is meant to be a normal autonomous robot arm, so it uses more powerful (but less easily movable) motors.
Setup
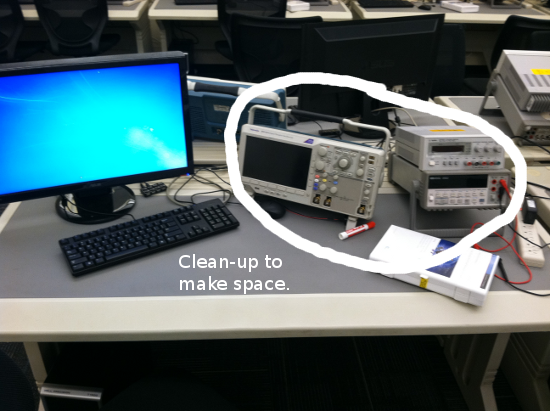
If you are using the robot arms (or even just the leader arm) in lab, please follow the setup instructions below. Since we are sharing the lab, I am afraid that you will have to setup and cleanup the manipulator each time. Here is how the setup goes:
- First, you’ll have to move the other lab’s stuff by sort of piling it up in the corner.
-
Second, grab a leader/follow manipulator pair the shelf and bring it to desk. You will need the robot arms, two 5V power supplies (one per arm), two usb-c cables (again, one per arm), and four c-clamps.
-
Mount the manipulators to the table using the 4 c-clamps as shown below.
-
Connect one 5V power supply to each manipulator arm using the barrel connectors.
Python Setup
Before communicating with the robots, you will need to configure your Python environment and install LeRobot (the low-level communication package for the robots).
Installing Python
-
First, you will need to make sure that you have Python installed on your computer. I recommend doing this using vscode, which is discussed more next.
-
While there are many ways to edit/run python code, I highly recommend using Visual Studio Code. This software also makes it easy to install python by downloading the official Python Extension. For more information on using python in vscode, I recommend this tutorial.
Installing Miniconda
Since python packages can quickly conflict and cause problems, we will be utilizing conda to create and manage python environments. We will be specifically utilizing Conda (miniconda to be exact) to manage our Python environments.
Select your operating system below for command-line installation steps. These commands come from the official Anaconda documentation. If you run into trouble or want more details (including graphical installers), see the Miniconda installation guide.
For more details, see Anaconda’s Windows command-line install guide.
- Open PowerShell (this is also the default terminal in VS Code) and download the installer to your home folder:
cd ~
Invoke-WebRequest -Uri "https://repo.anaconda.com/miniconda/Miniconda3-latest-Windows-x86_64.exe" -OutFile ".\Miniconda3-latest-Windows-x86_64.exe"
If you are using Command Prompt instead, run:
cd %USERPROFILE% curl https://repo.anaconda.com/miniconda/Miniconda3-latest-Windows-x86_64.exe --output .\Miniconda3-latest-Windows-x86_64.exe - Launch the installer:
.\Miniconda3-latest-Windows-x86_64.exeIn the setup wizard, accept the license agreement, select Just Me (recommended), and keep the default install location. The install path must not contain spaces or special characters. Then click Install.
-
When the installer finishes, open Anaconda Prompt from the Start menu. You should see
(base)at the start of the prompt, e.g.(base) C:\Users\<username>>. - To use
condain PowerShell and the VS Code terminal (not just Anaconda Prompt), run the following in Anaconda Prompt, then close and reopen your terminals:conda init powershell
If PowerShell reports that running scripts is disabled after conda init, run Set-ExecutionPolicy -Scope CurrentUser RemoteSigned in PowerShell and reopen the terminal.
For more details, see Anaconda’s macOS command-line install guide.
-
Open Terminal and download and run the installer that matches your Mac’s chip. Not sure which you have? Click the Apple menu > About This Mac: “Apple M1/M2/M3/…” means Apple Silicon, and “Intel” means Intel.
Apple Silicon (M-series):
cd ~
curl -O https://repo.anaconda.com/miniconda/Miniconda3-latest-MacOSX-arm64.sh
bash ~/Miniconda3-latest-MacOSX-arm64.sh
Intel:
cd ~ curl -O https://repo.anaconda.com/miniconda/Miniconda3-latest-MacOSX-x86_64.sh bash ~/Miniconda3-latest-MacOSX-x86_64.sh -
Follow the installer prompts: press Enter to scroll through the license, type
yesto accept it, press Enter to accept the default install location, and typeyeswhen asked whether to initialize conda. -
Refresh your shell (or close and reopen Terminal):
source ~/.zshrcYou should now see
(base)at the start of your terminal prompt.
Anaconda is phasing out support for Intel Macs; the final Miniconda release for Intel Macs is version 25.7.x. The Intel installer above still works for this course.
For more details, see Anaconda’s Linux install guide.
-
Open a terminal and download and run the installer that matches your processor. Run
uname -mif you are not sure:x86_64is most PCs, andaarch64is ARM (e.g. a Raspberry Pi or Jetson).x86_64:
cd ~
curl -O https://repo.anaconda.com/miniconda/Miniconda3-latest-Linux-x86_64.sh
bash ~/Miniconda3-latest-Linux-x86_64.sh
aarch64:
cd ~ curl -O https://repo.anaconda.com/miniconda/Miniconda3-latest-Linux-aarch64.sh bash ~/Miniconda3-latest-Linux-aarch64.sh -
Follow the installer prompts: press Enter to scroll through the license, type
yesto accept it, press Enter to accept the default install location, and typeyeswhen asked whether to initialize conda. -
Refresh your shell (or close and reopen the terminal). Use the command for your shell (
bashis the default on most distributions):source ~/.bashrc # bash source ~/.zshrc # zshYou should now see
(base)at the start of your terminal prompt.
Once installed, verify that Conda works by running any conda command. For example:
conda list-> Displays a list of packages installed in your active environment and their versions.conda --version-> Should display conda’s version number
Conda Environment Setup
Note that these steps are taken from the official setup instructions. I have rewritten them here for clarity:
- First, we will create a fresh conda environment for lerobot
conda create -y -n so101 python=3.12 - After creating the conda environment, you will need to activate it. You will also need to repeat this step to activate the environment every time you open a new terminal.
conda activate so101 - Install ffmpeg into the conda environment
conda install ffmpeg=7.1.1 -c conda-forge
Install LeRobot Code
We will need to clone the LeRobot repository (or pip install it) in order to run the open-source calibration and teleoperation code. For the course, I recommend cloning the repository so that you can more easily see the base code. If you are uncomfortable with git, you can also install the package using pip, those instructions are provided here. The instructions for cloning the git repository and installing the toolbox is outlined below.
-
Open a terminal and navigate to a folder where you want to store the code for the lab.
- Clone the Lerobot git repository
git clone https://github.com/huggingface/lerobot.git cd lerobot - Install the library in editable mode
pip install -e . - Install Feetech SDK (the motor software development kit)
pip install -e ".[feetech]"
Setting up communication
Data is communicated from your computer to the robot arms via the two usb-c cables. To communicate properly, we will need to first identify and store the ports associated with each robot.
-
First, connect both robot arms to your computer using the two usb-c cables.
-
Second, connect power to both robot arms: you will need a 5V power supply for the leader arm (THIS IS IMPORTANT!), and a 12V power supply for the follower arm.
-
After connecting all of the cables, we can find the port for each bus servo adapter (the controller board on the robot). To do this, we will run the following code, one time for each cable. When the command is run, follow the prompt and unplug the cable when prompted.
lerobot-find-portThe cable that was unplugged will correspond to the robot with the associated servo adaptor (MotorBus) port.
An example output is shown below:
Example on Mac
Finding all available ports for the MotorBus.
['/dev/tty.usbmodem575E0032081', '/dev/tty.usbmodem575E0031751']
Remove the USB cable from your MotorsBus and press Enter when done.

[...Disconnect corresponding leader or follower arm and press Enter...]

The port of this MotorsBus is /dev/tty.usbmodem575E0032081
Reconnect the USB cable.
Where the found port is: /dev/tty.usbmodem575E0032081 corresponding to your leader or follower arm.
Example on Linux
On Linux, you might need to give access to the USB ports by running:
sudo chmod 666 /dev/ttyACM0
sudo chmod 666 /dev/ttyACM1
The example output on linux should be:
Finding all available ports for the MotorBus.
['/dev/ttyACM0', '/dev/ttyACM1']
Remove the usb cable from your MotorsBus and press Enter when done.

[...Disconnect corresponding leader or follower arm and press Enter...]

The port of this MotorsBus is /dev/ttyACM1
Reconnect the USB cable.
Where the found port is: /dev/ttyACM1 corresponding to your leader or follower arm.
- Copy your MotorBus Ports to an empty file!!! These will be used in the calibration scripts next.
Calibration
Next, you’ll need to calibrate your robot. This process will save a script to your PC that is required to properly use the robot arms. This process differs slightly based on which robot arm you are calibrating:
Follower arm calibration
Run the following command or API example to calibrate the follower arm. The video here shows how to perform this calibration. First you need to move the robot to the position where all joints are in the middle of their ranges. Then after pressing enter you have to move each joint through its full range of motion.
lerobot-calibrate \
    --robot.type=so101_follower \
    --robot.port=/dev/tty.usbmodem58760431541 \ # <- The port of your robot
    --robot.id=my_awesome_follower_arm # <- Give the robot a unique name
Leader arm calibration
Do the same steps to calibrate the leader arm, run the following command or API example:
lerobot-calibrate \
    --teleop.type=so101_leader \
    --teleop.port=/dev/tty.usbmodem58760431551 \ # <- The port of your robot
    --teleop.id=my_awesome_leader_arm # <- Give the robot a unique name
Teleoperation
Once you are connected and calibrated, you are ready to run teleoperation!
- Run the following in a terminal. Note that you will need to update the ports and robot ids to the ones you identified and used in the above calibration commands:
python lerobot-teleoperate \
 --robot.type=so101_follower \
 --robot.port=/dev/tty.usbmodem58760431541 \ # <- The port of your follower arm robot
 --robot.id=my_awesome_follower_arm \ # <- The unique name of your follower arm
 --teleop.type=so101_leader \
 --teleop.port=/dev/tty.usbmodem58760431551 \  # <- The port of your leader arm robot
 --teleop.id=my_awesome_leader_arm # <- The unique name of your leader arm
On a mac you may need to run using a slightly different command
python -m lerobot.teleoperate \
    --robot.type=so101_follower \
    --robot.port=/dev/tty.usbmodem58760431541 \ # <- The port of your follower arm robot
    --robot.id=my_awesome_follower_arm \ # <- The unique name of your follower arm
    --teleop.type=so101_leader \
    --teleop.port=/dev/tty.usbmodem58760431551 \  # <- The port of your leader arm robot
    --teleop.id=my_awesome_leader_arm # <- The unique name of your leader arm