This week we will be exploring the use of mujoco to recreate our hardware code from last week. Thus, the first step is to download MuJoCo.
Download and Run MuJoCo
MuJoCo is a state-of-the-art physics engine (simulation environment). This software was recently (2021) acquired and made open-source by DeepMind and has become a staple of the robotics/ML community. For more information on MuJoCo, you can visit their website. The raw codebase is also available at the google-deepmind/mujoco repository on GitHub.
In our class, we will only be using the python bindings of MuJoCo which allows for simple installation using a single pip install:
pip install mujoco
Note that if you do not want to install this package system-wide, you can always activate your conda environment from last week (do this prior to the pip install):
conda activate so101
To test that mujoco was installed properly, run:
python -m mujoco.viewer
This should open up an empty visualization window: 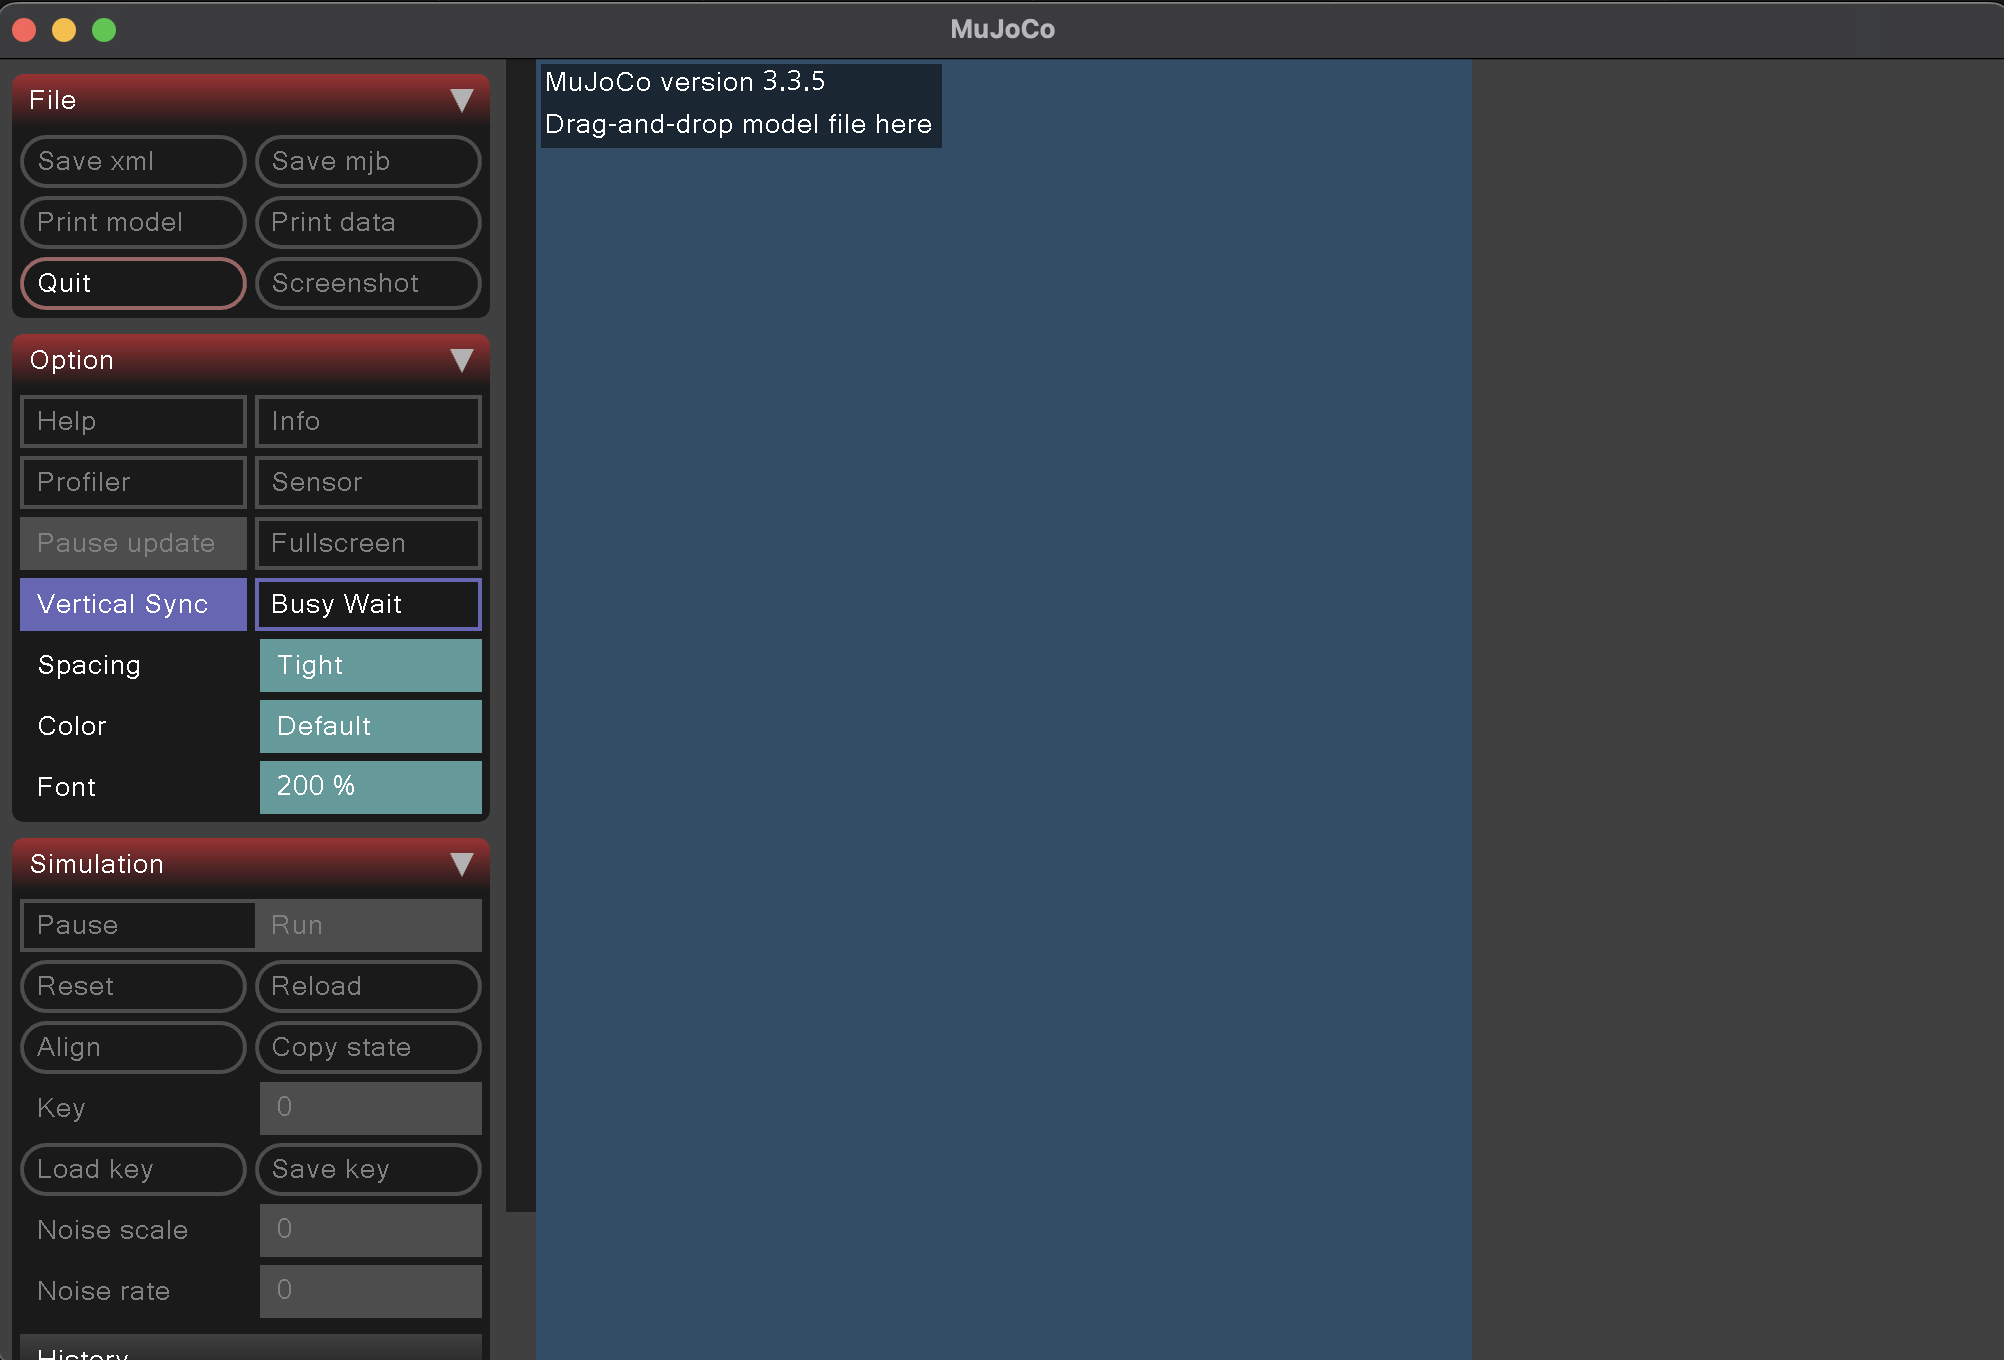
Download SO101 Model
Next, download the SO101 model information (xmls and mesh files) from https://github.com/TheRobotStudio/SO-ARM100/tree/main/Simulation/SO101. Note that you will need the scene.xml and so101_new_calib.xml files in the same folder location as well as a subfolder named assets with all of the mesh files. I recommend that you place these all of these in a folder of your so101 directory named something like model. The easiest way to do this is to download the entire SO-ARM101 repository as a zip folder and extract the SO101 folder. Your folder paths should look something like this:
.ECE_FOLDER
├── hardware_code/          #(Code from last week)
├── simulation_code/
│   ├── model/
│   │   ├── scene.xml
│   │   ├── so101_new_calib.xml
│   │   └── assets/
│   │   |   ├── (mesh files)
│   ├── mujoco_simulation.py
│   └── so101_mujoco_utils.py
Note that we will be creating mujoco_simulation.py and so101_mujoco_utils.py later. Note also that you should navigate to within the simulation_code/ folder in the terminal to run all subsequent code.
cd $ECE_FOLDER/simulation_code
To test that your model was downloaded correctly, you can open it in a mujoco visualization window using the command:
python -m mujoco.viewer --mjcf=model/scene.xml
Note that this opens the model scene.xml which is contains the actual xml (so101_new_calib.xml) as well as some additional items such as a floor and lighting.
If you’ve downloaded your model correctly, you should see the following: 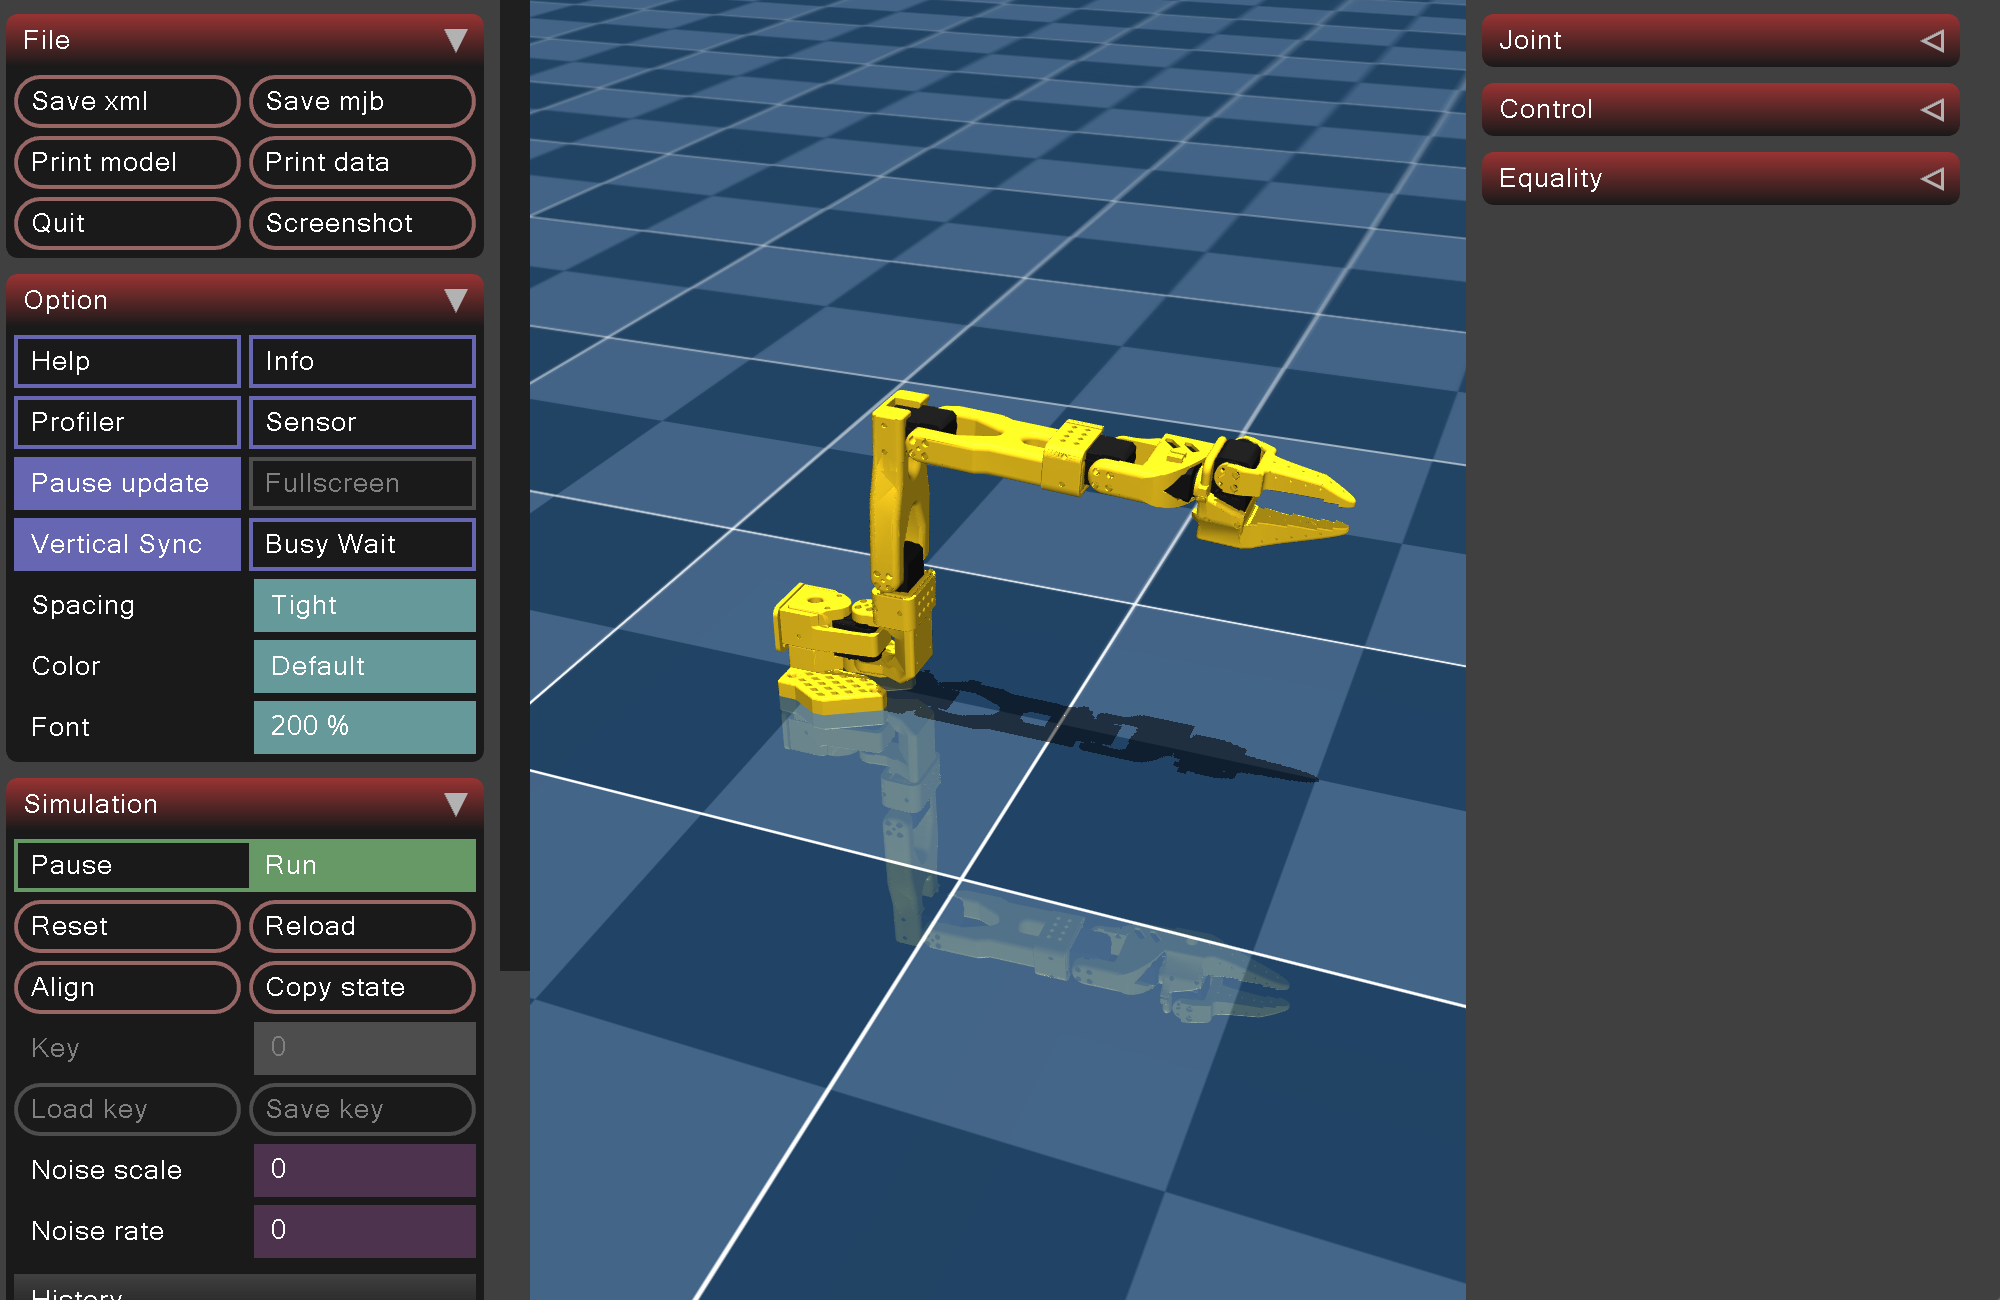
Run Mujoco Simulation
The example code for running a mujoco simulation (provided online by DeepMind) is the following. We will be modifying this code to recreate our motion from last week (start at the current position, move to a desired position, and return to the starting position).
import time
import mujoco
import mujoco.viewer

m = mujoco.MjModel.from_xml_path('model/scene.xml')
d = mujoco.MjData(m)

with mujoco.viewer.launch_passive(m, d) as viewer:
  # Close the viewer automatically after 30 wall-seconds.
  start = time.time()
  while viewer.is_running() and time.time() - start < 30:
    step_start = time.time()

    # mj_step can be replaced with code that also evaluates
    # a policy and applies a control signal before stepping the physics.
    mujoco.mj_step(m, d)

    # Example modification of a viewer option: toggle contact points every two seconds.
    with viewer.lock():
      viewer.opt.flags[mujoco.mjtVisFlag.mjVIS_CONTACTPOINT] = int(d.time % 2)

    # Pick up changes to the physics state, apply perturbations, update options from GUI.
    viewer.sync()

    # Rudimentary time keeping, will drift relative to wall clock.
    time_until_next_step = m.opt.timestep - (time.time() - step_start)
    if time_until_next_step > 0:
      time.sleep(time_until_next_step)
Mujoco Helper Functions
To “simulate” our SO101 code as closely as possible, we will create a few helper functions to replicate the dictionary nature of the robot positions and switch between radians and degrees (MuJoCo uses radians, but SO101 uses degrees and normalizes the gripper to the range 0-100).
- Create a new helper file named
so101_mujoco_utils.py:
import time
import mujoco

def convert_to_dictionary(qpos):
    return {
        'shoulder_pan': qpos[0]*180.0/3.14159,    # convert to degrees
        'shoulder_lift': qpos[1]*180.0/3.14159,   # convert to degrees
        'elbow_flex': qpos[2]*180.0/3.14159,      # convert to degrees
        'wrist_flex': qpos[3]*180.0/3.14159,      # convert to degrees
        'wrist_roll': qpos[4]*180.0/3.14159,      # convert to degrees
        'gripper': qpos[5]*100/3.14159            # convert to 0-100 range
    }

def convert_to_list(dictionary):
    return [
        dictionary['shoulder_pan']*3.14159/180.0,
        dictionary['shoulder_lift']*3.14159/180.0,
        dictionary['elbow_flex']*3.14159/180.0,
        dictionary['wrist_flex']*3.14159/180.0,
        dictionary['wrist_roll']*3.14159/180.0,
        dictionary['gripper']*3.14159/100.0
    ]
Set Initial Position
The first simulation code that we will create will simply initialize the robot in a designated “starting” position and keep it there indefinitely. This will require a few additions to the helper code:
- Set Initial Position in Mujoco Data Structure
def set_initial_pose(d, position_dict):
    pos = convert_to_list(position_dict)
    d.qpos = pos
This code writes directly to the Mujoco Data structure (in particular, the joint positions stored in qpos). Since d is a pointer to this structure, any changes made through d directly affect the original data in memory. As a result, there is no need to return anything from the function.
- Send Position Commands to the Model
def send_position_command(d, position_dict):
    pos = convert_to_list(position_dict)
    d.ctrl = pos
This code updates the ctrl field within the MuJoCo data pointer. Since the actuators are defined as position actuators in the XML, each value in ctrl specifies a desired joint position. MuJoCo uses a built-in low-level PD controller (with gains set in the XML) to track these target positions.
We can put these together in a python script titled something like run_mujoco_simulation_startingpose.py
import time
import mujoco
import mujoco.viewer
from so101_mujoco_utils import set_initial_pose, send_position_command

m = mujoco.MjModel.from_xml_path('model/scene.xml')
d = mujoco.MjData(m)

starting_position = {
    'shoulder_pan': 0.0,   # in degrees
    'shoulder_lift': 0.0,
    'elbow_flex': 0.0,
    'wrist_flex': 0.0,
    'wrist_roll': 0.0,
    'gripper': 0.0           # 0-100 range
}
set_initial_pose(d, starting_position)

with mujoco.viewer.launch_passive(m, d) as viewer:
  # Close the viewer automatically after 30 wall-seconds.
  start = time.time()
  while viewer.is_running() and time.time() - start < 30:
    step_start = time.time()

    send_position_command(d, starting_position)

    # mj_step can be replaced with code that also evaluates
    # a policy and applies a control signal before stepping the physics.
    mujoco.mj_step(m, d)

    # Pick up changes to the physics state, apply perturbations, update options from GUI.
    viewer.sync()

    # Rudimentary time keeping, will drift relative to wall clock.
    time_until_next_step = m.opt.timestep - (time.time() - step_start)
    if time_until_next_step > 0:
      time.sleep(time_until_next_step)
Lastly, to find a reasonable starting position that matches what we typically see on hardware, we can use the mujoco.viewer to manually adjust the joint angles until we find the correct joint angle. Remember from before that this is done by running:
python -m mujoco.viewer --mjcf=model/scene.xml
Note that you will need to pause the simulation before you can manually adjust the sliders. Also remember that you will need to convert between radians and degrees (the viewer displays the joint angles in radians). Adjust the joint angles until you find the following position: 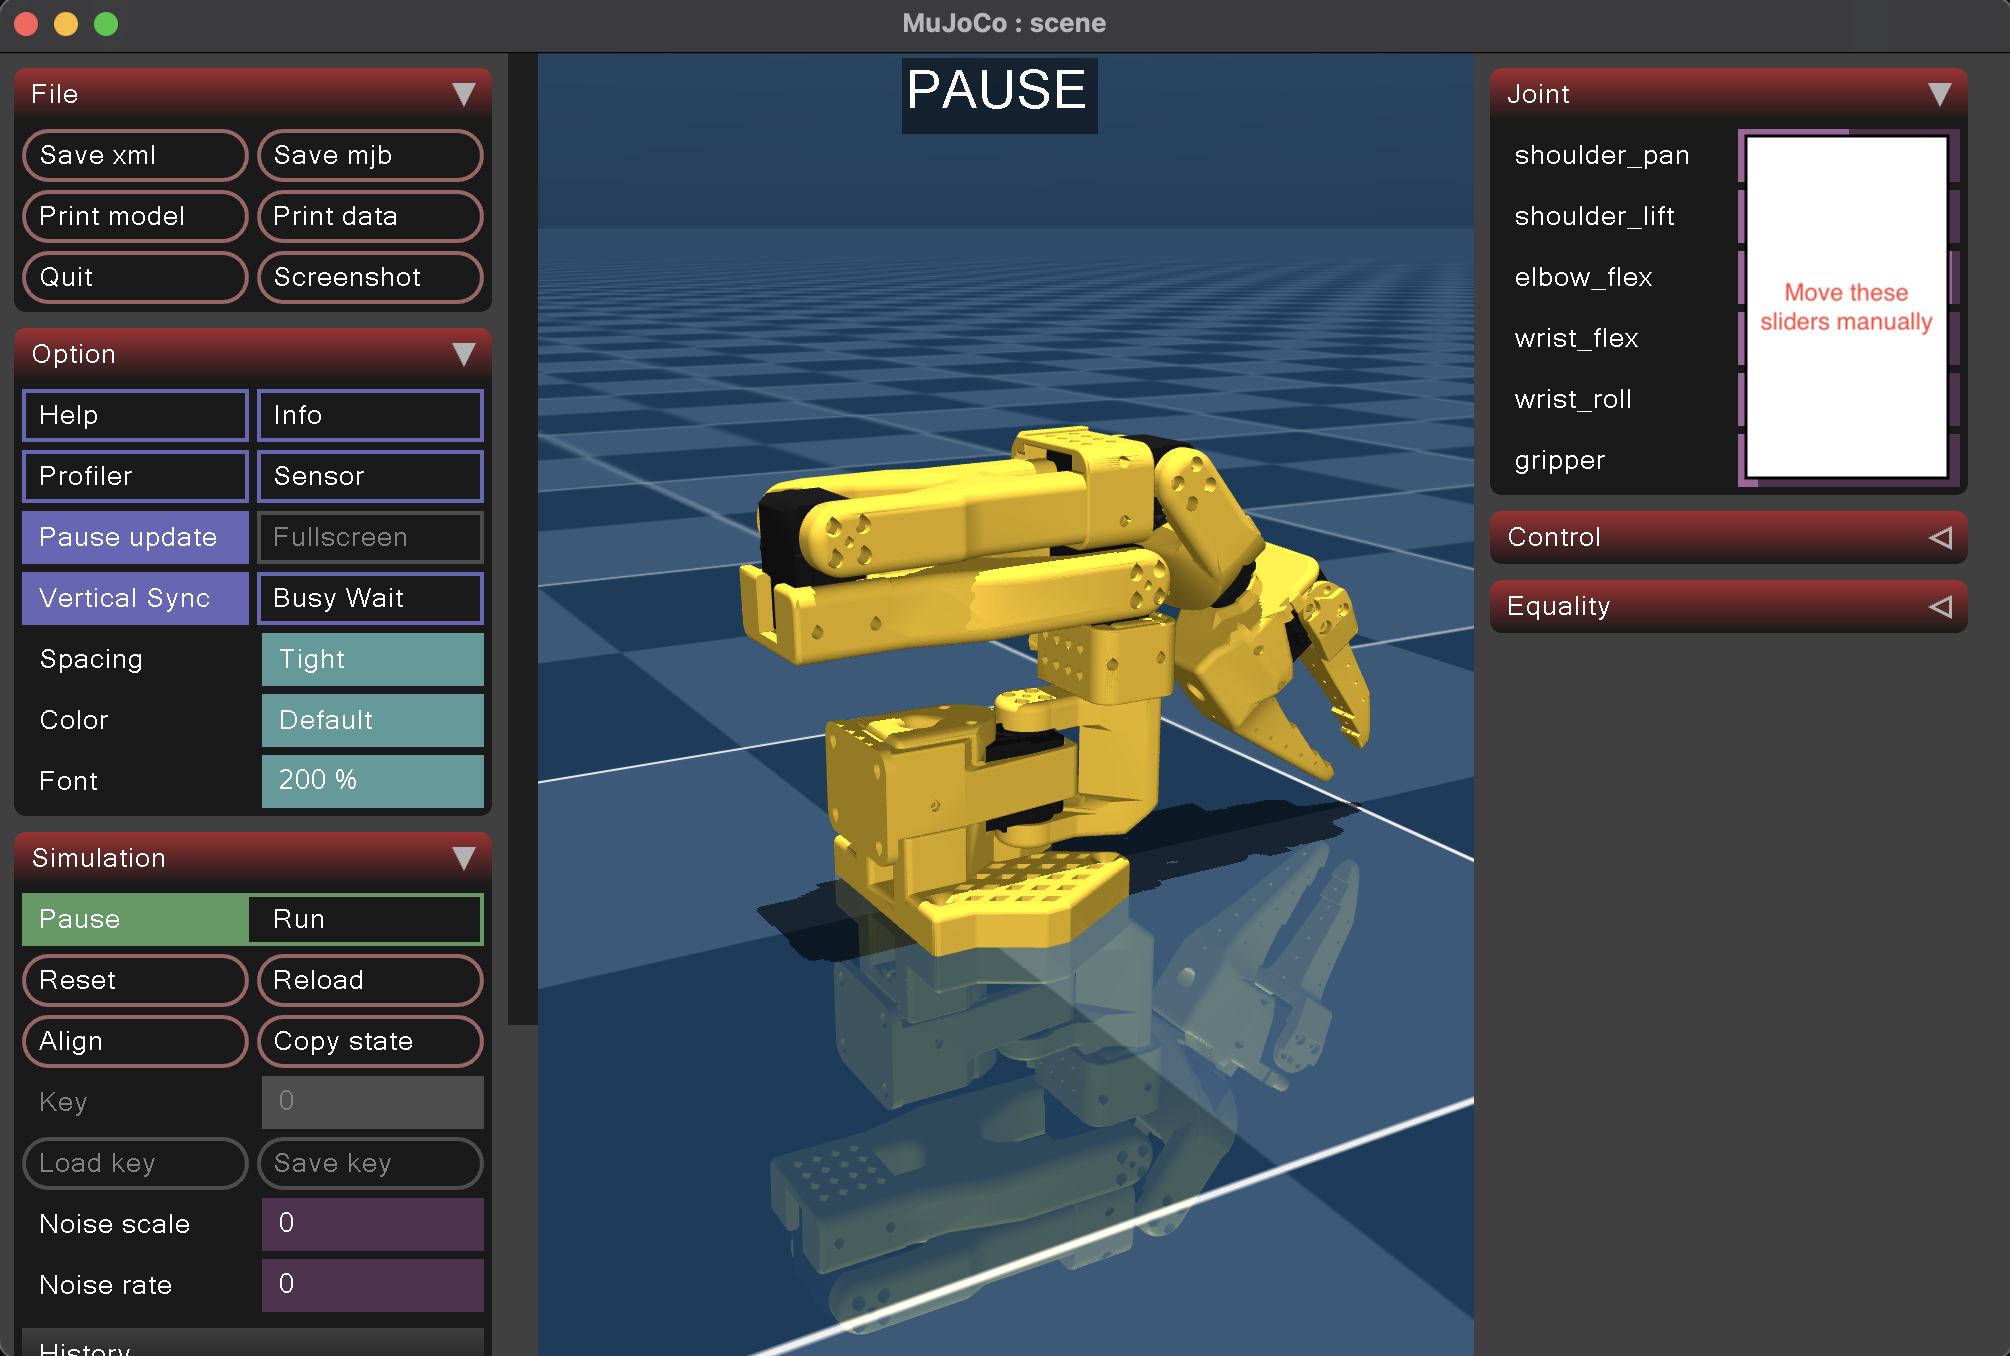
Replicate Robot Motion
To replicate last week, we will need two final helper functions. These helper functions will replicate our move_to_pose and hold_position functions from last week:
import mujoco

def move_to_pose(m, d, viewer, desired_position, duration):
    start_time = time.time()
    starting_pose = d.qpos.copy()
    starting_pose = convert_to_dictionary(starting_pose)

    while True:
        t = time.time() - start_time
        if t > duration:
            break

        # Interpolation factor [0,1] (make sure it doesn't exceed 1)
        alpha = min(t / duration, 1)

        # Interpolate each joint
        position_dict = {}
        for joint in desired_position:
            p0 = starting_pose[joint]
            pf = desired_position[joint]
            position_dict[joint] = (1 - alpha) * p0 + alpha * pf

        # Send command
        send_position_command(d, position_dict)
        mujoco.mj_step(m, d)

        # Pick up changes to the physics state, apply perturbations, update options from GUI.
        viewer.sync()

def hold_position(m, d, viewer, duration):
    current_pos = d.qpos.copy()
    current_pos_dict = convert_to_dictionary(current_pos)

    start_time = time.time()
    while True:
        t = time.time() - start_time
        if t > duration:
            break
        send_position_command(d, current_pos_dict)
        mujoco.mj_step(m, d)
        viewer.sync()
Use these helper functions to create a new simulation file (named something like run_mujoco_simulation.py) that
- Starts at the position shown in the figure above
- Moves to a desired position of all zeros across a total duration of 2.0 seconds
- Holds the desired position for 2.0 seconds
- Returns to the starting position across a duration of 2.0 seconds.
Note that since the move_to_position and hold_position functions call mujoco.mj_step() inside of the command, your simulation code can be only simplified to only call the helper functions after opening the viewer:
with mujoco.viewer.launch_passive(m, d) as viewer:

  # Go to desired position

  # Hold Position

  # Return to starting
This should result in the following motion:
Submission Details
To document the lab for this week, please upload a screen recording of you running your mujoco simulation and upload it to youtube (it can be unlisted). Then please include a link to the video with the homework submission. Please also write a small report of any issues/difficulties that you faced.